Mastering the Art of Sourdough: A Guide to Crafting Flavourful and Irresistible Loaves
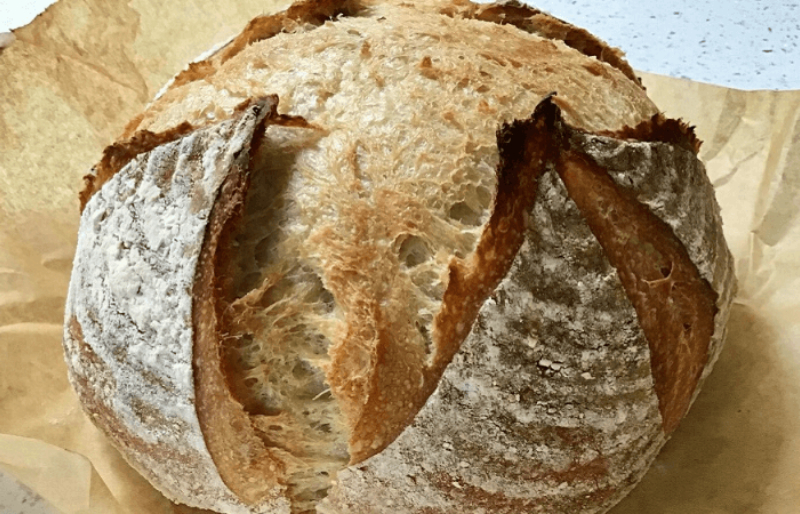
There's something truly magical about the aroma of fresh, home-baked sourdough bread that fills the air and warms the heart. The delightful marriage of a crisp, golden crust and a soft, tangy interior is a sensation that captures the essence of homemade comfort. Crafting your own sourdough bread brings a unique sense of accomplishment and flavour to your table. And when it comes to achieving this culinary feat, the Kilner Sourdough Starter Kit stands as a trusted companion for both seasoned bakers and newcomers alike.
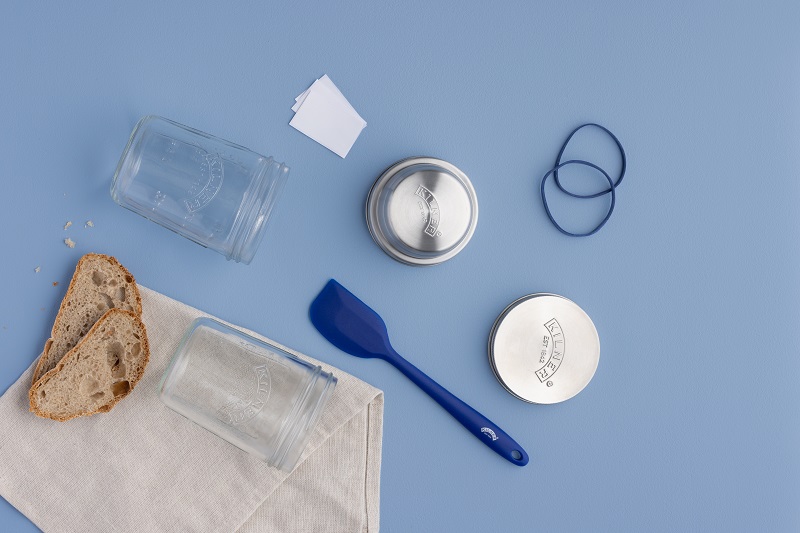
This Sourdough Starter Kit doesn't just provide tools; it offers an immersive experience that deepens your connection with the age-old art of sourdough. Inside the elegantly designed packaging lies a ceramic jar—a cozy home for your burgeoning sourdough starter. Accompanying it is a delicate muslin cloth, ready to drape the jar in an airy embrace. However, the true magic of the Kilner kit lies in the meticulously curated instructions that guide you through the process. So, whether you're a seasoned baker or a curious novice, this kit promises a fulfilling adventure that ends with a slice of homemade sourdough that's as much a triumph of patience and dedication as it is a feast for the senses.
Prior to creating a sourdough loaf, it's essential to prepare a pre-fermented blend of flour and water, commonly referred to as the sourdough starter.

How to make a sourdough starter
The sourdough starter is a live culture. Once mixed, it initiates fermentation, nurturing the inherent wild yeasts and bacteria found in the flour.
As it develops, the starter transforms into yeast, lending the distinct sourdough taste and facilitating dough leavening. Crafting your personal sourdough starter is an uncomplicated process that concludes in 7-10 days, rendering it ready for use.
You will need:
- All-purpose flour or whole wheat flour
- Filtered water or pre-boiled water which has been cooled
- Kilner® Sourdough Starter Set
Method
Day 1: Using the Kilner® measuring lid, measure out 60 grams of flour and 60 grams of water (please see the diagram of measurements) and empty into the jar.
Using the spatula, stir well until smooth, make sure there are no clumps. Use the spatula to stir and clean the inside walls of the jar. Screw the metal lid on loosely, as you will need to allow some air to enter the jar. Leave to rest at room temperature of 20–22 °C (68–72 °F) for 24 hours.
Day 2: Stir the starter to incorporate air, screw the lid on loosely again and let it rest for another 24 hours at room temperature.
Day 3: Start the feed. Using a clean jar, measure out, 60 grams of starter you created in days 1 and 2, discard the rest of the mixture. The excess mixture can be used for pancakes and naan bread. In the same jar, using the Kilner® measuring lid, measure 60 grams of flour and 60 grams of water and combine with the starter.
Use the spatula to stir the mixture and clean the inside walls of the jar. Mark the level of the starter with the rubber band. Screw the metal lid on loosely, as you will need to allow some air to enter the jar. Leave to rest at room temperature of 20–22 °C (68–72 °F) for 24 hours.
Time and date your starter using the white labels to keep track. The sourdough starter will now start to activate and you will start to see bubbles appearing inside the jar.
Day 3-7: Feed twice a day. Repeat every day up to 7-10 days. The yeast should already be activating so the starter will rise when it starts to warm up and gets active.
The starter will leave a mark on the sides of the glass walls when it’s hungry. It is much easier to see if the starter has risen when you keep the glass jar walls as clean as possible, using the spatula. You won’t need to clean the jar each day, but ensure to keep the jar clean as possible.
During the feeding, discard 60 grams of your starter then scrape away as much of the residual as you can from the glass walls. Twice a day, weigh out 60 grams of the starter and discard the rest. In the same jar, using the measuring lid, measure 60 grams of flour and 60 grams of water and combine with the starter.
Use the spatula to stir the mixture and scrape the residue from the inside walls of the jar. Mark the level of the starter with the rubber band. Screw the metal lid on loosely, as you will need to allow some air to enter the jar. Leave to rest at room temperature of 20–22 °C (68–72 °F) for 24 hours.
By day 4, look for the hunger signs. This’ll be shown through the starter rising and falling. If the starter shows no signs of whether it has risen or fallen, then only feed once every 24 hours.
Feeding the starter when it isn’t hungry will dilute the growing yeast. By day 5 to 7, the starter should look visibly active, with bubbles, rising and close to doubling in size.
Day 7: The starter should hopefully be doubling in size within 4-6 hours of feeding. Let the starter rest at room temperature for 8 hours. At this stage, the starter should be active, with bubbles through and nearly reaching the top of the jar.
Float Test
Day 7-8: To test the starter, place a teaspoon from the top of the starter in a glass full of water. If it floats, you can now make Sourdough Bread! If the starter does not float, it’ll just require a few more days. Continue to feed once or twice a day, until you see a consistent, rise and fall, do the float test again.
If you need to take a break, keep the starter in the fridge for up to 7 days and try it again.
Here's a video on the full tutorial of making the sourdough
Recipe source: Kilner
Sourdough Loaf Recipe
Ingredients
- 500g Strong unbleached white bread flour
- 300g Mature sourdough starter
- 250ml Filtered water
- 2tsp Salt
- Flavourless oil
Method
- Mix the flour, sourdough starter and 250ml / 8.5 fl oz filtered water in a mixing bowl. Add the salt.
- Tip the dough on to a floured work surface and knead for 10 minutes.
- Place the knead dough into a lightly oiled bowl, cover with a damp tea towel and leave to prove for 2 ½ -3 hours.
- Tip the dough onto a work surface and knead briefly to knock out any air bubbles. Shape the dough into a smooth ball and dust it with flour.
- Line a medium-sized bowl with a clean tea towel and flour it really well or use a proving basket.
- Place the dough, seam-side up, into the bowl or proving basket and cover loosely.
- Leave at room temperature until it roughly doubles in size. This can take anywhere from 4-8 hours.
- Place a large baking tray in the oven and heat to 230°C/210°C fan.
- Fill a small roasting pan with a little water and place this in the oven to create steam.
- Remove the baking tray from the oven, sprinkle with flour, then carefully tip the dough on to the tray.
- Slash the top of the dough, if you like, then bake for 35-40 minutes until golden brown.
- Leave to cool on a wire cooling rack before serving.
Recipe source: Kilner
Next Read: Top things you can make with Kilner preserving jars other than jams


